
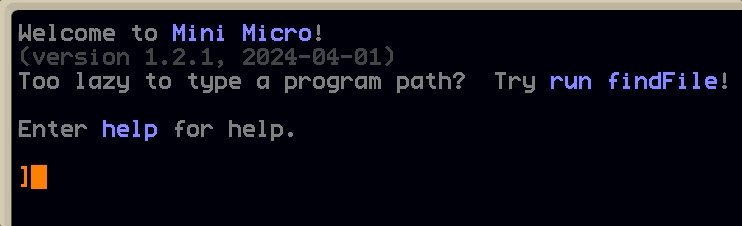
The Mini Micro virtual home computer, like classic computers of yore and unlike most modern machines, uses a text-based, command-line interface. It boots up and greets you with a friendly blinking cursor, ready for you to type commands.
But, unlike classic computers of yore, the MiniScript console (the part of the machine that handles text input) supports a variety of keyboard shortcuts to make your life easier. If you don't know about these, you're probably working harder than you need to! Read on to learn all the tricks.
Basic Usage
You probably already knew that you can use the Left/Right arrow keys to move the cursor forward and back through the text already entered so far. Note, however, that in a command-line interface like Mini Micro, text entry happens one line at a time. You can't use the up/down arrows to go to any other text on the screen (those keys have a different function that we'll get to shortly). You also can't back up (to the left) before where the cursor was when the text entry started, nor advance (to the right) past the end of the text you've entered so far.
To delete a character, you have two options. The Backspace key deletes the character to the left of the cursor, and also moves the cursor left. The Delete (marked Del on some keyboards) key, also known as "forward delete", deletes the character under the cursor (without moving it).
When you're done entering and editing your line of text, of course, you let Mini Micro know by pressing the Return or Enter key.
Working by whole words
The first power trick you should certainly know is that, for the Left, Right, Backspace, and Delete keys described above, you can make them work by entire words at a time by adding the Control or Alt (sometimes labeled Option) key.
So, for example, Control+Left moves the cursor to the start of the current word, or if it's already at the start of a word, then it goes to the start of the word before that. Control+Right moves to the end of the current or next word. Similarly, Control+Backspace deletes to the start of the current/previous word, and Control+Delete deletes the next word. These are huge timesavers! Watch me edit this command (recalled from command history — which I swear we will get to shortly) using these by-word key combos:
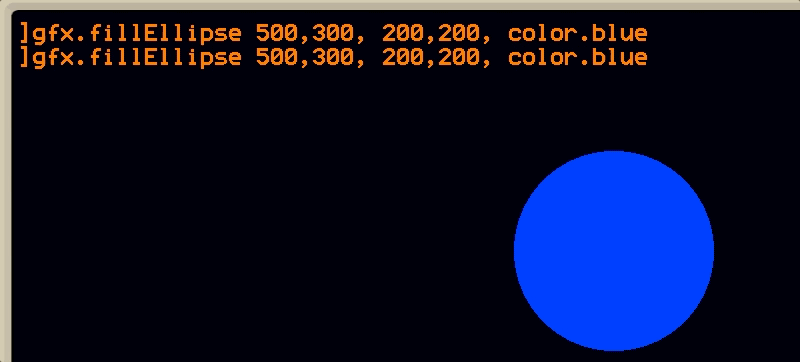
First I smacked Control+Left a few times to back up to the 500, and then I advanced a couple of characters (using Right by itself) to change it to 520. Then I zipped forward again (using Control+Right), deleted "blue" in one stroke of Control+Backspace, and changed it to "red".
Depending on your host platform and the software you use, either Control or Alt plus left/right/backspace/delete probably works in your other desktop apps, too. So this is a standard you can get used to and apply everywhere.
Even Bigger Jumps
Editing by words is pretty fast, and as you could see above, it's really all you need. But in many cases (including that one!), you can do better. You can move or delete from the cursor all the way to the start or end of the line.
To support this, Mini Micro borrows some standard shortcuts from Unix terminal editing: Control+A to jump to the start of the line, and Control+E to jump to the end of the line.
To delete instead of just moving the cursor, use Control+U to delete to the start of the line, and Control+K to delete to the end of the line.
Support for these in desktop apps is a little more spotty. On MacOS, for example, most input fields support Control+K but not Control+U. However, if you do ever use a Unix/Linux environment, you'll probably find these habits carry over there nicely. And you can always count on them in Mini Micro!
So in the example above, I could have done my edit even faster:
-
Control+Ato jump to the start of the line -
Control+Righttwice to advance to "500" -
Rightonce more to get to the "0",Deleteto delete that, and2to insert "2", making it "500" -
Control+Eto jump to the end of the line -
Control+Backspaceto delete "blue" - "red" to enter the new color
Pretty slick, eh?
Command History
I did promise to get to this, and here we are: Mini Micro maintains a history of previous inputs. You can get to these previous inputs by pressing the Up arrow key, as many times as needed to get back to the one you want. Once you've started this process, you can use Down to go back to more recent inputs (or clear the historical input so you can type something new).
Autocomplete
Finally, if you're on the command line (rather than at an input prompt), Mini Micro will attempt to guess what you're typing based on what you've typed so far. It will do this only when there is some unambiguous completion. When it has such a guess, it will draw it in faint text ahead of the cursor. You can either ignore it and keep typing, or you can press Tab to accept it, and it will be entered just as if you had typed it yourself.
For example:

Here, I typed gf, and in faint text behind the cursor, Mini Micro suggested "x". I hit Tab to accept it (no great savings here, as it was only one character, but still). Then I typed "f", and Mini Micro immediately suggested "ill". That's because, while there are several methods on gfx that start with "f", they all begin with "fill". So I hit Tab again and saved a couple keystrokes.
Then, I typed an "e", and nothing happened. This is because I wanted to demonstrate that MiniScript (and the autocomplete function) are case-sensitive, and totally not because I made a mistake while making this GIF. After deleting the "e" and typing a proper uppercase "E", autocomplete now suggested the rest of the command, "llipse", which I again accepted with Tab.
Use of Autocomplete is pretty obvious, and probably something you noticed very quickly when you started using Mini Micro. But now you know for sure!
Complete Table
I've tried to gather all the editing keys available in one big table below. Notice that for many functions, there are several equivalent keys you can use.
| Key Combo | Effect |
|---|---|
Left |
moves cursor left 1 character |
Control+Left
|
moves cursor to previous word |
Alt+Left
|
moves cursor to previous word |
Control+Right
|
moves cursor to next word |
Alt+Right
|
moves cursor to next word |
Home |
moves cursor to start of line |
Control+A
|
moves cursor to start of line |
End |
moves cursor to end of line |
Control+E
|
moves cursor to end of line |
Backspace |
deletes character to left of cursor |
Control+Backspace
|
deletes previous word |
Alt+Backspace
|
deletes previous word |
Delete |
deletes character under cursor |
Control+Delete
|
deletes next word |
Alt+Delete
|
deletes next word |
Control+K
|
deletes from cursor to end of line |
Control+U
|
deletes from cursor to start of line |
Up |
recalls previous input from history |
Down |
recalls next input from history |
Tab |
accepts autocompletion text, if any |
Get Typing!
The above shortcuts work wherever you see the blinking box cursor in Mini Micro — both on the command line, and when entering a response to an input command.
So what are you waiting for? Fire up Mini Micro and give these new tricks a try. You'll be glad to have them in your typing toolkit. And if you don't have Mini Micro already, click the button below to get it — it's 100% free and ad-free. Happy coding!

Top comments (0)