In the previous post we briefly discussed what webhooks are and why they might be helpful. In this post, we will look at a step-by-step implementation of a cloud-hosted solution for dispatching webhooks for our application.
Note: In order to proceed you will need an AWS account. Luckily, all of the features within AWS we will be using are free within the limits we will be exploring.
How it Works
We will be making use of two AWS products in order to build our webhooks solution: Simple Queue Service (SQS), and Lambda.
Lambda is a serverless execution platform for running code remotely. This will be the logic component of our solution, written in node, and will be ultimately responsible for dispatching the webhook. Our function will live inside Lambda, and it will listen for events within the AWS ecosystem and then execute that function using parameters from that event.
Our Lambda function will be listening for an SQS event, which will fire every time a new item is added to our SQS queue.
Simple Queue Service is essentially a message bus for AWS and third party services. We push items (called messages) into SQS, which are then read by consumers who act on those messages.
In our case, we will configure our Lambda function to be our consumer, who will automatically read any message added to the queue and use it to submit our webhook request.
Step One: Configure the Queue
Our first step is to create the queue where we will submit our webhook events.
From your AWS homepage, find and open the SQS service.
Note: you can either search the page for the service by name, or use the search function, which supports common acronyms for AWS services, such as "SQS".
Assuming you have never worked with SQS before, you should see the following screen:
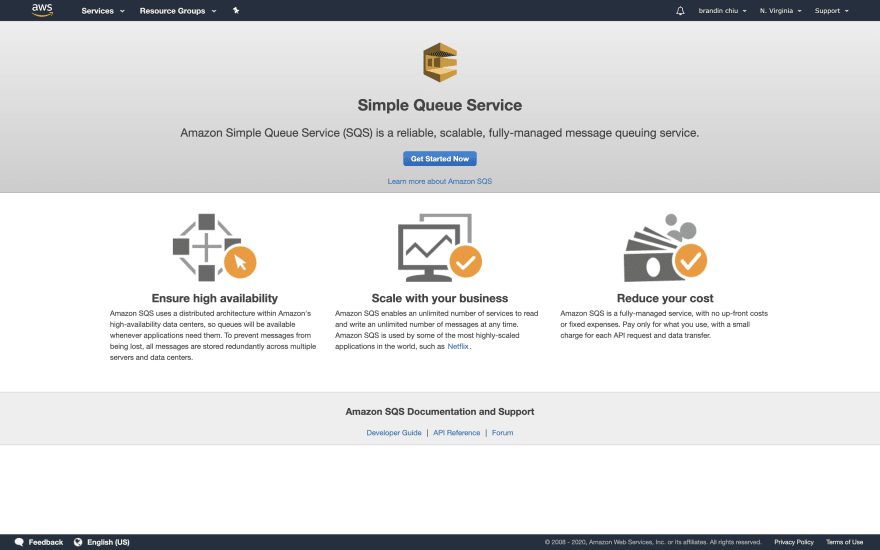
Click the "Get Started Now" button to be prompted to create your first queue, or create a new queue from the queue list.
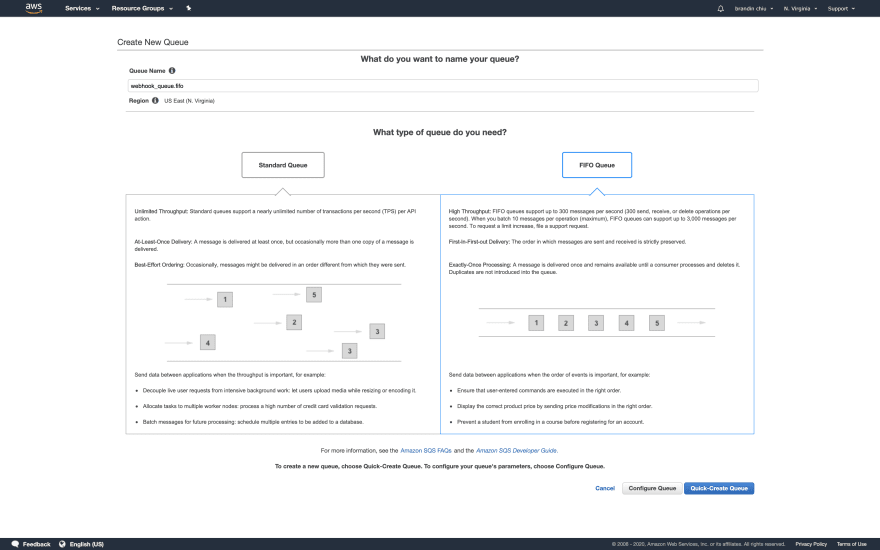
SQS supports two different kinds of queues: standard and FIFO. The SQS service provides high-availability and redundancy for your messages by mirroring them across hundreds of AWS servers. This can sometimes mean that whenever you query AWS for a new set of messages, you may possibly receive the same message twice. Normally, it's up to your application to correctly handle duplicates. Additionally, in standard queues, messages are not handled in-order.
For these reasons, we will be using Amazon's "FIFO" (or first-in-first-out) queues. Amazon will limit these queues to process the messages sent to them in order. This also prevents duplicates from being entered into the queue. You can learn more about the different queue types here.
Click the "Quick-Create Queue" button to create our FIFO queue.
There are a number of configuration parameters that can be defined for how our queue should behave. These are outside the scope of what we need to worry about at this point, but I encourage you to read more about them here.
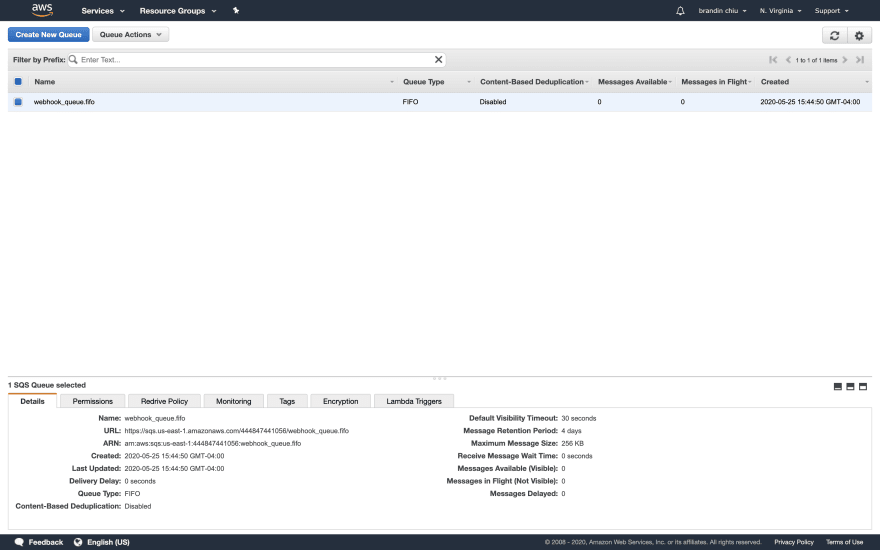
You should see the queue list screen with our new queue!
Step Two: Configuring our Lambda Function
Now that our queue is configured and ready to receive messages, we need to set up our Lambda function and hook it up to the queue to act as our consumer.
Return to the AWS homepage or click on the "Services" header and search for "Lambda". You should see the Lambda screen like below:
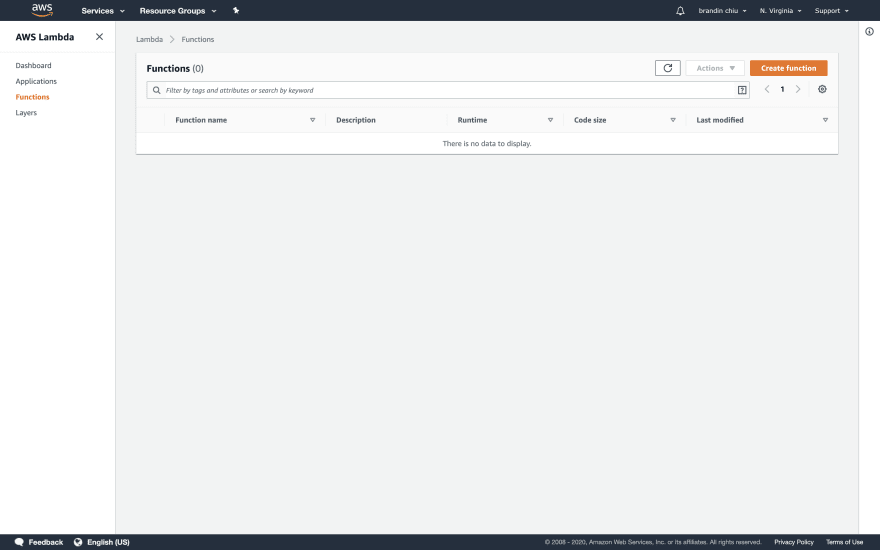
Click the orange "Create Function" button in the top-right corner to get started creating a new function.

Give your function a name and choose node as your runtime.
Under "Permissions" select "Create a new role from AWS policy templates". Give your new role a name, and then under "Policy templates" start typing "sqs" until you see the "Amazon SQS poller permissions" policy.
Note: Amazon and most other cloud providers use a system called IAM to restrict permissions to invoke their services. These rules are created as roles which are then attached to users and other services. In our case, to allow our Lambda function to talk to SQS, we need to create a new IAM role (or use an existing one) with the correct permissions and attach it to it.
Click "Create function" in the bottom right when ready.
Next, click the "+ Add Trigger" button to link our Lambda to our SQS queue.
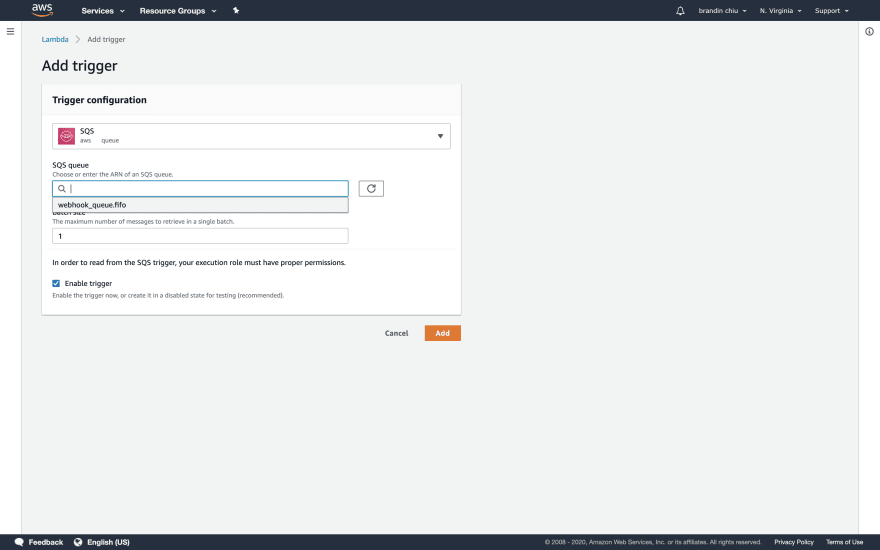
Set "SQS" as the service, select the queue we created in step one, and set the batch size to 1.
Click "Add" when done.

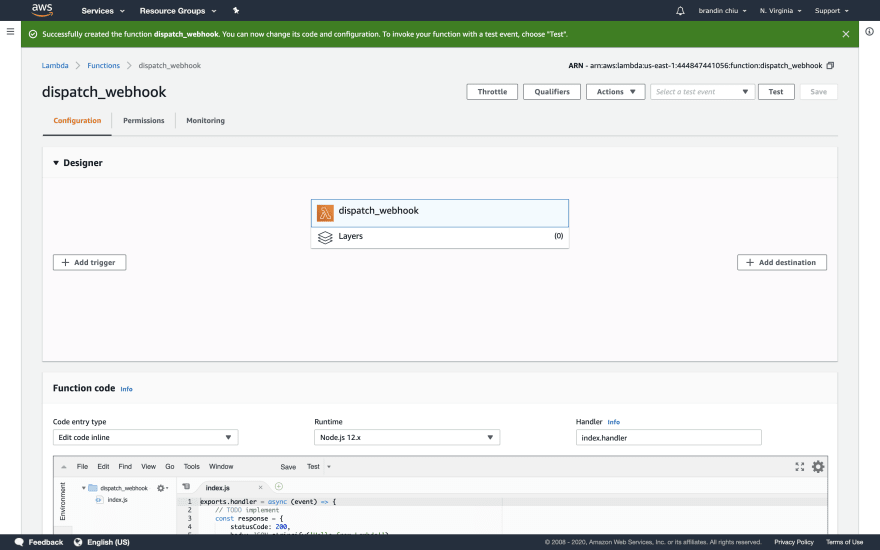
Now, select our Lambda functions name from the center of the diagram and scroll down to the "Function code" section.
Our code is going to submit the webhook request using the node-fetch package, which means we'll need to add it as a dependency. In order to properly bundle the needed node_modules, I've included a zip file below for you to upload to Lambda by "Code entry type" to "Upload a zip file".
https://misfitpixel-public.s3.amazonaws.com/lambda.zip

The zip file includes the necessary dependencies and a single JS file, index.js, which includes our function code:
const fetch = require('node-fetch');
const { name, version } = require('./package.json');

exports.handler = async event => {
  const promises = event.Records.map(record => {
    const url = record.messageAttributes.url;
    const method = record.messageAttributes.method;

    if (url == null || method == null) {
      return Promise.resolve();
    }

    return fetch(url.stringValue, {
      method: method.stringValue,
      body: record.body,
      headers: { 'Content-Type': 'application/json' }
    }).catch(console.error);
  });

  await Promise.all(promises);
};
Lambda provides data from our incoming SQS messages from an event object it passes to our function which we then use to submit the request. Ultimately, all this function does is read data from the incoming SQS message, and submit a new request to a provided URL from that data. It submits those requests as a promise which we do not bother resolving, since we don't really care how the target endpoint responds to our request.
Note: in a production example, we would probably want to do some level of error handling in order to provide some kind of retry service for failed hooks or better error logging to the client.
Once your code is uploaded and you're ready, click the orange "Save" button at the top right.
Step Three: Test our Solution
Good news for us, the SQS dashboard provides a nice, clean way to push messages directly to our queue without needing to install or build any other software. This gives us a simple mechanism to simulate our backend infrastructure.
We're going to need a destination endpoint to test that our webhook was delivered, so we'll use the service provided by https://webhook.site. This will give us a temporary endpoint to play with, and an interface to verify our requests.
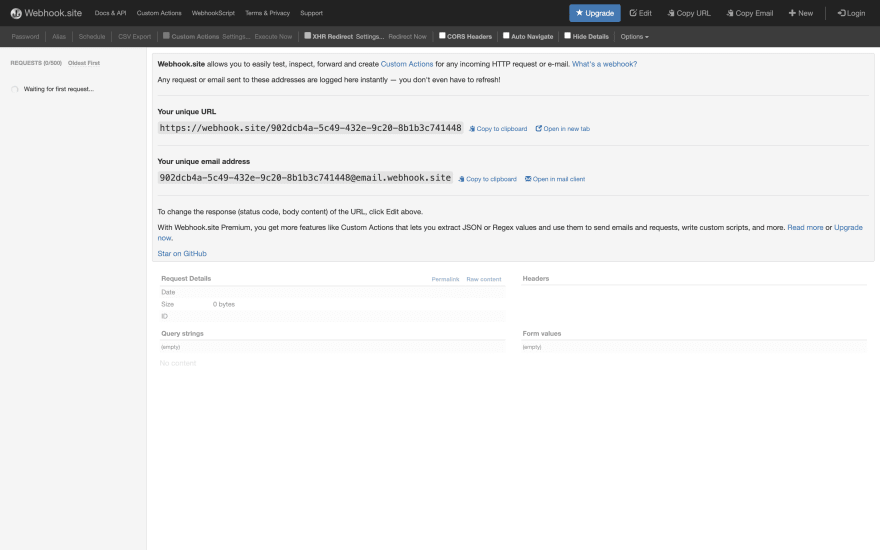
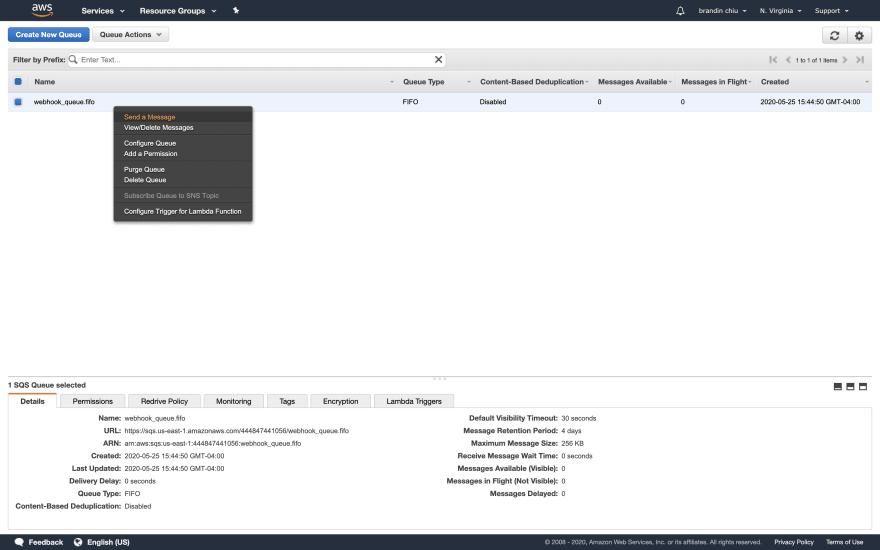
Copy your unique URL from the page, and then navigate back to the SQS dashboard inside AWS. If you right-click on the name of your queue, a context menu will pop up and give you the option to "Send a message".
SQS messages consist of a combination of a string body, and key-value pairs called "attributes".
Our solution in particular makes use of both. Our HTTP request body is stored in the message body, and then we store the HTTP method name, and the URL itself as an attribute.
Note: we've included the HTTP method as an attribute as an example. However, your webhook requests should really always dispatched as a POST request.
Start by adding a message to your queue with whatever body you want.
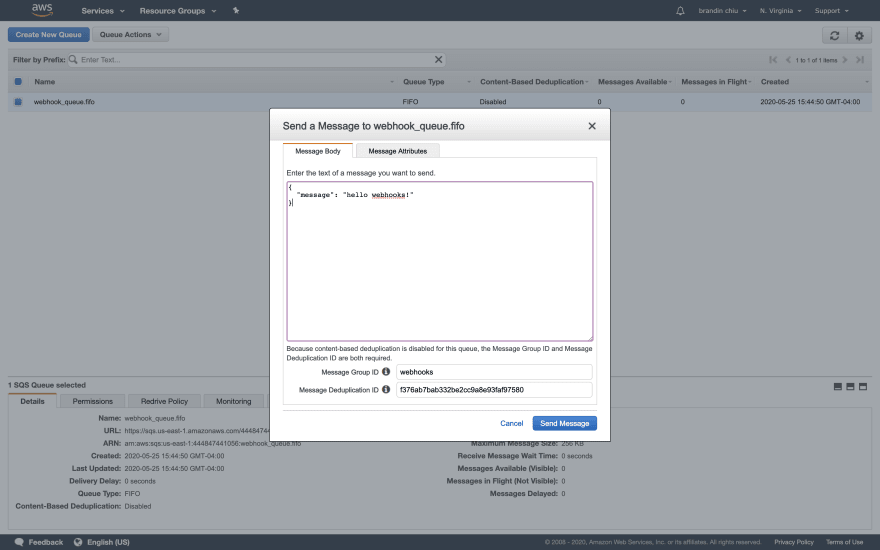
You'll also notice two other fields underneath our body. These requirements are specific to FIFO queues. For our tests, you can really enter any text data into these fields.
Note: the Message Group ID is an optional sub-collection within your FIFO queue. Messages with the same Group ID will always be managed in FIFO order. If you have messages where the processing order does not matter, you can give them different (or random) Group IDs.
Note: the Message Deduplication ID is a unique identifier for a particular message. No two items in a FIFO queue can share a deduplication ID. If you push a message to the queue with the same ID as one already in it, your new upload will be ignored. It's common practice to use an MD5 hash of your message contents as the deduplication ID to unique identify messages (which SQS can do for you automatically through your queue configuration).
Next, add the attributes we discussed above: your HTTP method, which will be POST, and your url, which will be your unique webhook.site endpoint.
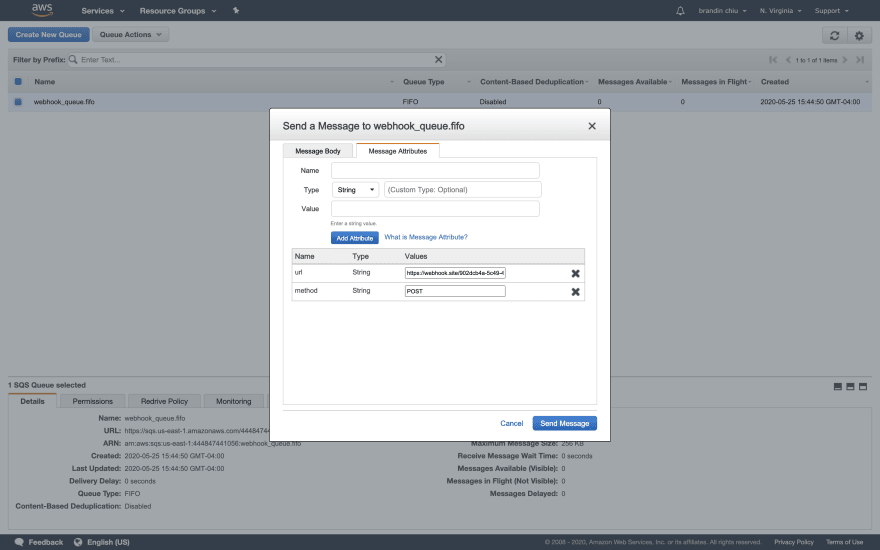
Simply enter the attribute name, followed by it's value, and then click the "Add Attribute" button to add it to the message.
Once you're done, click "Send Message", then close the confirmation dialog.
Your message will be pushed to the queue, but you may notice that after you return to the queue dashboard, AWS will list there being no messages pending in your queue.
This is due to the connection of our Lambda to our queue. As soon as our message hits the queue, AWS sends an event to Lambda, who then consumes and deletes the message with our Lambda function.
If we navigate back to our webhook.site dashboard, we should see our request with the message body:
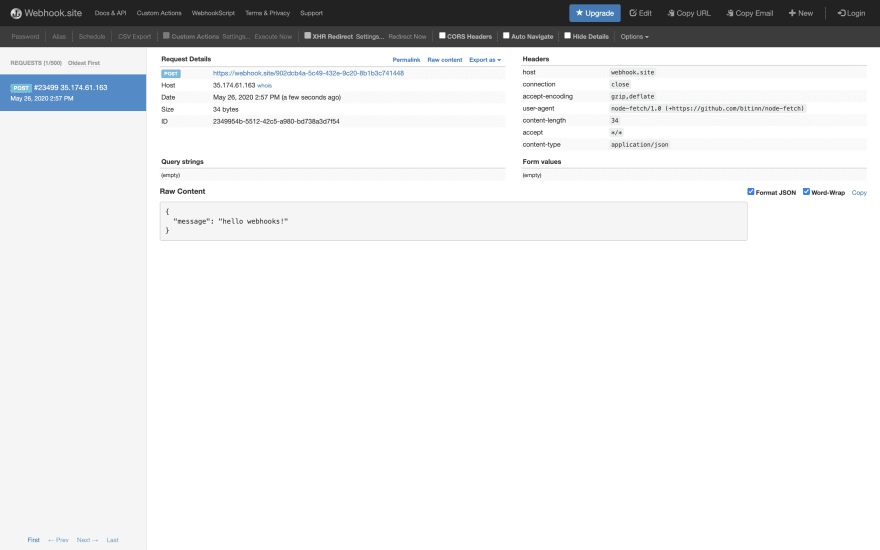
Our solution works! We can do one last step of confirmation by checking the Lambda logs.
Navigate back to your Lambda function, and then click the "Monitoring" tab. At the top right of that page, you'll find a "View logs in CloudWatch" button.

Clicking on that button will open the cloud logs where you can view the output of your Lambda function's execution.

Note: our logs here only contain default logging information from Lambda. If we were to add our own
console.log()statements to our function, those outputs would be captured here as well.
Conclusion
We've completed the backend cloud architecture of our webhook solution and verified that it is working. We've established a queue to hold our outgoing webhooks, and linked it to a serverless function via Lambda to consume those messages and dispatch the webhook.
At this point, the last step is to connect it directly to our own application.
Amazon provides SDKs for most major languages, which you can quickly add to your application to start interacting with AWS services. Doing this requires creating a "programmatic" user account account ID and secret to authenticate with the SDK, and then using it to push messages to SQS, which will then automatically be picked up and handled by Lambda.
Ultimately, your application will also require the ability to register an endpoint with an event in your application.
Hopefully this tutorial gave you a quick glimpse of how you can use Amazon Web Services to quickly set up a backend to handle dispatching webhooks for your application!
The next article will look to do the same thing over again, but using Google Cloud instead!

Top comments (0)